Translate

====================

====================
Dear Reader,
I share here what I like and what works for me. If you've been following me, you know that I can change my mind from time to time, and feel free to comment that I'm completely wrong, you may be right. I'm not running a business. I'm not paid and have never received any compensation or facilitation for any review/brand/site here mentioned. In case one day we'll ever meet, I'll be the one offering you a cup of Italian coffee, too.
====================

Wednesday 28 October 2015

to split


No threads were destroyed in tatting that chain, however, a significant number of neurons were terribly inconvenienced.

Thank you very much for playing and for all your nice comments. Just to add a bit of info here, the white thread I used in the last post is thinner than a size 80, I think it is a piece of size 100. First, when I was learning how to do the magic trick, I was told to use a thicker thread but that didn't work for me.

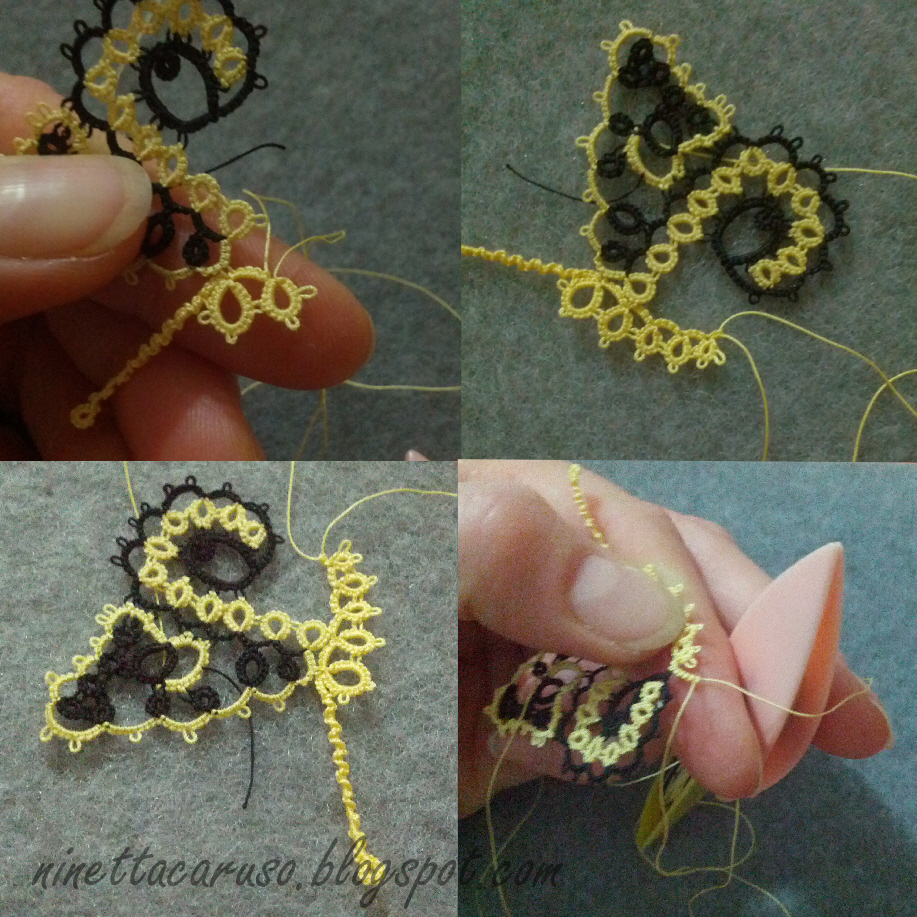
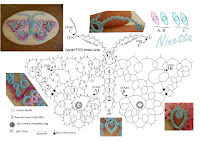
Stephanie in her comment described what I did (except that about the tapestry needle!):


1) I connected last red ring to the first, normal join
2) tatted the chain till the point to be connected to the long picot
3) encapsulated the long picot (and the red core thread) inside the green stitches. I did it simply using the split chain method with the green shuttle
4) continued with the last part of the chain as usual (not in the picture)

The little red loop at the base of the first ring it's there for the magic trick at the end, it has nothing to do with the pattern.

To refresh the split chain:
Video: Frivolite-Tatting Lesson 14 - split chains
http://www.janeeborall.freeservers.com/SplitChain.pdf
http://www.georgiaseitz.com/classes/gssplitchain.html

Ciao,
Ninetta
P.S. I'll post again next week, when - I hope - I would have finished the Anne Orr's doily. Have a nice weekend.

Monday 26 October 2015

grip

Three little ds grip a long picot tightly.
Test tatting the centre of a doily (?) for Christmas.
Dmc size 80 thread.

I needed another thread (the white one in the picture), looped as though you were inserting a bead on the picot. Then I tatted on it encapsulating both threads. Pulling the white loop, ds are positioned on the picot.

Would you mind to play with me two days to solve the puzzle in the last picot?... Any guess?

Ciao,
Ninetta

Friday 23 October 2015

vintage front side tatting?

I think so... It's nice joining all wheels the same side facing, least that I'm not distracted!

Ciao,
Ninetta

Wednesday 21 October 2015

focus on it

There's only 9 wheels to reach the end of that doily, I can only tat one of them each day so I'm confident to finish by a couple of weeks... If I won't make silly mistakes, like forgetting a join. I'll recover it using the old way of tatting!
Tatting with the new ball of Lizbeth it is a pleasure, thread is finally collaborating and doesn't break every 5 rings, as the last part of previous ball did.

Actually, I admit, I'm not focused on it. I've started some test tatting for Christmas and - a big big fault - I bought a beautiful bobbin lace's magazine. I hardly can make something from it, but a lovely edging for a hanky. You can get a glimpse of it in the upper side of the photo. That would rather be another candidate for the long list of UFOs...

On evenings, after dinner, while watching tv, I'm in part tatting wheels, in part test tatting my doodles and in part making the filét lace. Something will be finished, if I ever could focus on one thing at a time!
The needle used to make the net is called "mòdano" in Italian. Don't look too close to my net, please, it's absolutely misshapen!

Ciao,
Ninetta

Monday 19 October 2015

delivered

That is how it looked

It flied with me on Friday, a short journey, just one hour, and landed in Calabria, in front of Stromboli.


Best wishes, dear friends!

Ciao,
Ninetta

Friday 16 October 2015

butterfly in slow motion - part 3

Part 3 is the body of the butterfly.
The body starts at the ring on top of the antenna:

It is worked CTM with 2 shuttles filled with a yellow dmc size 80 thread. After the little ring, the antenna is a zig zag chain, that is 4 first half ds followed by 4 second half ds, repeated for 8 times. That is called also "victorian set", as I found it here: http://www.georgiaseitz.com/setstitch.html

Then there's a face inward picot, there's various methods to do it, I've just mine that I showed in a drawing in Flickr: https://flic.kr/p/agHxVU


Wings are joined along the body. It may be finished at this point, a pretty butterfly side viewed on a flower, so we need the pattern for a flower. Priscilla's pansy?


The pointed bottom of the body has two stitches made with the second shuttle, an effect that Jon called Pointed chain:
http://tatsaway.blogspot.it/2011/06/pointed-chain.html

That is how I do it:
https://flic.kr/p/9Cbk3R

When attaching the second wing, pay attention to don't twist picots. I lay the second wing over the first, then open it like a page of a book.

The 2ds split chain over the head, between antennas, it could be avoided, but I like it.

For the last antenna I have a trick. In the first I made, that actually came out very floppy, the tension can't be perfectly regulated at the end. So I thought to fold the core thread as in a SSSC, tat the zig zag chain and the last ring (with 2nd shuttle). Blocked the core thread loop with the ball thread, at the end I had just to pull the first shuttle to adjust the antenna.

That's all!
I hope to see your butterflies soon! Happy tatting!

Ciao,
Ninetta

Wednesday 14 October 2015

butterfly in slow motion - part 2

The next photo shows that the join in the first butterfly I tatted in 2011 is a wee bit better positioned at that point. That is because I joined those picots (up and down) at the same time with a CWJ. 
But this time I first joined the upper picot (the one that belong to the lower part of the wing), then I joined the picot under the chain with a CWJ, that substituted for one double stitch. I think the effect is quite the same and the process is simpler than the previous.
It's fundamental that both threads are on the same side of the motif, otherwise it will be very tricky to continue. I put both on the back of what already done, but it's just my personal choice.

So, here it is the sequence of stitches at the connection point (we are at the chain already tatted of 2-2-2, where we stopped to join) :
- upper join
- CWJ (it replaces one ds)
- 2 ds
- upper join
- CWJ
- 3 ds
All that you can find in the pattern as 2 joins (with black dots - marked wrongly), a chain of 3 ds between and a next chain of 4.

Useful links for the CWJ:
http://www.janeeborall.freeservers.com/CatherineJoin.pdf
http://yarnplayertats.blogspot.com/2011/03/catherine-wheel-join-my-video-demo.html
http://yarnplayertats.blogspot.it/2011/04/catherine-wheel-join-in-still-photo.html

After the chain, I reversed the work and tatted the last ring, then a last chain.
I hid the ends using a similar method to Frivole’s:
http://leblogdefrivole.blogspot.it/2011/03/more-hiding-ends-and-eightsome-reel.html

But instead of hiding both threads inside, I sewed the yellow thread with a needle.

All we can do now is tatting the other wing, exactly the same.

Ciao,
Ninetta

Monday 12 October 2015

butterfly in slow motion - part 1

Tatting a butterfly in slow motion, I mean...
I chose yellow and black, dmc size 80 thread, just in spite of showing better the pattern, but I'd rather not suggest a so strong difference in colours, for the fact that hiding ends into each other colour is difficult, and maybe if you are fussy like me you'd like to avoid colours' blips.

The pattern is here: https://flic.kr/p/zsKuNk
But I'm - bumbling - sorry that in my patterns there's always something to amend. In this case, points in wings, marked as face inward picots, they are down sided joins instead. As you'll see later, I tatted CWJ there, because I wanted a smooth effect.

PART 1 - Wings.

I started with 2 shuttles loaded with those two colours but unwind a short tail from black. The pattern starts with a chain, I left a loop as though it was a scmr:
I've a drawing that shows how I tat a face inward Josephine Ring, it is here:
https://flic.kr/p/cb72Dj

I did a shoelace trick, then started the first chain.
At that point I cut the black and added the yellow for the first ring, hiding both ends inside the first double stitches (black inside the ring and yellow inside next chain):

The pattern is then a series of rings and chains partly connected to the central motif. The upper part of the wing starts switching shuttles and direction, so that chains will be yellow and rings will be black.

I continued till the point where the chain must be joined to the lower part.
Then, here there is the point where I put up and down joins very close together in the same chain. As it is a little fiddly, I'll put it off till the next post.

Ciao,
Ninetta

Friday 9 October 2015

bond over a thread

The Ann Orr's large doily restarted, thanks to Fox that sent me a second ball of Lizbeth col.131. I bet she loves this multicoloured thread, too. (She also sent a hanky, white and delicate, I love it! Thank you!)

She had sent last year the first ball, it's a mix of colours that I really love, but I must agree with her about the quality. The last shuttle loaded from the ball went on breaking at points where the hue changes. Nevertheless, practise adding a new thread is good, isn't it?
Another shuttle has been already loaded for a fresh start.


In evident state of euphoria and trying to catch up the pattern, I wrongly connected two rings on the same side, so that I had 13 repetitions instead of 12. Scissors came. Yes, sigh, they do sometimes!
Ciao,
Ninetta

Wednesday 7 October 2015

jointly

Chatting with friends and Sue F. of the Online Tatting Designers Class it's always very very inspiring, this time they mentioned the JSS, a join that I hadn't tried yet.

Also, I wanted to tat something with a lovely thread that the generous Colours' Fairy Fox has just sent me, a Lizbeth size 80, number 154, "Wildflower garden".

Actually I have one pattern in the set "granny squares" that I wanted to tat again and it has onion rings, where I could have tried the JSS, so I looked into my fantastic notebook (that I started just because Sue F. had insisted - thank you so much!) and found the drawing/scribble of "quad_25".

The JSS is the Anne Dyer's join, "join to the smooth side", there's a video by Karen Cabrera:
https://youtu.be/rN-wsHQQ6Dc

In former square, the motif tatted last year (green and yellow in pics), I used a normal slope and roll join, that's different from JSS only for the fact that the S&R has a back side, a quibble with size 80 thread and my eyesight! But I like more the JSS join and I think I'll use it again, instead of the S&R.

That is a pattern that needs a revision, too. One motif alone needs some blocking, while the ruffle disappears when 4 are joined together. United we stand, it seems!

I'm a little shy to share my attempts to filèt lace, there's A LOT of flaws. Anyway, that it is one:
It is worked with the help of a wooden frame, then the embroidery is on the stretched net.

Ciao,
Ninetta

Monday 5 October 2015

200 posts! - blog anniversary and 100,000 visits!

Wow, I can't believe it! Thank you so much to everyone who visited and a big hug for all your support and encouragement, that keeps me motivated to tatting, because - you know - tatting is beautiful but if you can tat with your friend's help it is even more beautiful!

I won't run a giveaway but revised an old pattern that I hadn't yet put in Flickr, a butterfly that I designed in 2011 and that inspired a new design that I wish to tat before this Christmas. There are a lot of UFO in my bag, but maybe I'll bore you to beg a little encouragement, one more time again!
https://flic.kr/p/zsKuNk
(Update: points marked as face inward picots, they are down sided joins instead. Sorry for this.)

I've plans to share a tutorial with photos to show how I tat that butterfly.

A giveaway? No I don't think so, I googled and found some sites where you are warned that it's similar to a contest and there could be a fine, a financial penalty, gosh... Mad mad world! (or better, I must say mad mad Italy!): http://www.ferri-e-uncini.com/2014/05/give-away-ecco-tutte-le-info-utili-per.html
 
About the last 2 days...

I met again those ladies from Bosa, they taught us a bunch of new stitches that I absolutely wish to incorporate in little doilies. That filèt lace is taking, I still don't know how much this could influence my tatting, but for sure they must live side by side in my craft space, they both need a lot of care!
But... what were they telling me to make me laugh in that way?
Ciao,
Ninetta

Friday 2 October 2015

dahlia

"Chiacchierino facilissimo" it means "very easy tatting", that is exactly how difficult it was tatting this dahlia!


I used the button as a brooch or alternatively buttoned up a chain of split rings and used as a collar.

It is one shuttle pattern. I used a dmc metallic thread for embroidery, 2 strands, and a silk thread size 3. Two rounds of rings (you can choose the size, for example I tatted rings with 6-9-6) joined one another in opposite direction, that is the third it's joined to the first, then the fourth to the second, 6 repetitions for the first round that is the inner part of the flower:


I brought the thread on the bottom part of the flower, didn't cut the thread, and continued with the second round, a lock join to the base of first petal it helps the stability:


Here it is the flower at the end of the inner round, there's a glass ball inside and a pencil:

Before starting the outer round, I left a little bare of thread:

10 or 12 repetitions for the outer round. I sewed the button and the red agate beads at the end, using - in part - the tail left from the shuttle.

Ciao,
Ninetta

Thank you very much for all your nice comments.

Ciao
Ninetta