The first part of the tds is always the same, that is:
- Start with a very small picot and one double stitch.
- Laying the picot across the ball thread and pull up a loop of thread through the picot.
- Then, take another loop of the ball thread and pull it through the previous loop.
- Now slip the shuttle through the loop thus formed. Don't tighten it, yet.
- Take a loop of the core thread in the ring finger, then pass the shuttle from back to front, through the loop, 3 times.
- Tighten the ball thread and don't let the core thread slip out of place.
- Then, pull the core thread.
- Start with a normal picot and one double stitch.
- Laying the picot across the ball thread and pull up a loop of thread through the picot.
- Then, take another loop of the ball thread and pull it through the previous loop.
- Now slip the shuttle through the loop thus formed. Don't tighten it, yet.
- Take a loop of the core thread in the ring finger, then pass the shuttle from back to front, through the loop, 5 times
- Tighten the ball thread and don't let the core thread slip out of place.
- Then, pull the core thread.
- Start with a picot a little higher than previous tds and one double stitch.
- Laying the picot across the ball thread and pull up a loop of thread through the picot.
- Then, take another loop of the ball thread and pull it through the previous loop.
- Now slip the shuttle through the loop thus formed. Don't tighten it, yet.
- Take a loop of the core thread in the ring finger, then pass the shuttle from back to front, through the loop, 7 times
- Tighten the ball thread and don't let the core thread slip out of place.
- Then, pull the core thread.
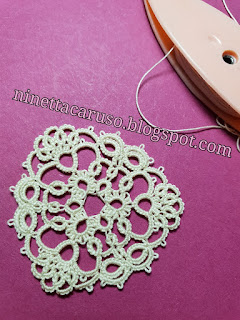
I designed another little motif, this time it is a triangular one. I confess I already shared this with Muskaan (muskaan's T*I*P*S), last week I sent her a close up picture and she's a very talented tatter, she could count my stitches and replicated it in a nanosecond! So, for I haven't written down the pattern yet, you bet she has my full permission to post her stitches' count in her blog! Thank you, Muskaan!
UPDATE: link to the pattern for this triangle: http://tipsaroundthehome.blogspot.com/2018/07/treble-with-m.html
I also have other WIPs started, I hope I will stay committed and finish something, sooner or later!
One is "Star Pattern in Tatting for a Chair or Sofa Tidy" by Mrs. Eliza Warren, a pattern from 1868, but I've changed it to have all motifs connected by split rings, instead of many little squared motifs. That is what I did till now:
The second old old pattern that I'm tatting is the modernised version by Ruth Perry of the "narrow edging" in Riego Royal Tatting book, 1864, that one where a real chain appeared for the first time, with clear instructions. The link to the renewed pattern is here:
http://tat-calendar.blogspot.com/search?q=riego+edging+15 , I found it easily, thanks to the hard work of sweet tatters who shares their time and knowledge in Craftree.
That will be an edging for the fan, I haven't decided yet for attaching it to the fabric or if I tat more rounds that would substitute the fabric.
Ciao,
Ninetta
✿✿✿✿✿✿✿✿✿✿✿✿✿✿✿✿
UPDATE:
Please refer to the page "Treble Tatting Stitch - Summary" for any info about treble tatting stitches, thank you.
✿✿✿✿✿✿✿✿✿✿✿✿✿✿✿✿
UPDATE:
Please refer to the page "Treble Tatting Stitch - Summary" for any info about treble tatting stitches, thank you.
✿✿✿✿✿✿✿✿✿✿✿✿✿✿✿✿


 :)
:)
 :(
:(
 :))
:))
 :((
:((
 =))
=))
 =D>
=D>
 :D
:D
 :P
:P
 :-O
:-O
 :-?
:-?
 :-SS
:-SS
 :-f
:-f
 d(
d(
 :-*
:-*
 b-(
b-(
 h-(
h-(
 g-)
g-)
 5-p
5-p
 y-)
y-)
 c-)
c-)
 s-)
s-)
 d-)
d-)
 w-)
w-)
 :-h
:-h
 :X
:X
Very beautiful tatted projects!!! :)
ReplyDeleteI love the triangle pattern, really different, not quite sure about these new TDS, I think it will take time to sink in my brain,
ReplyDeleteLook forward to seeing more about your new technique
Hmm, I did the 4-wrap tds differently. Intersting - will h ave to try your method and compare.
ReplyDelete'nanosecond' - reminded me of Mork & Mindy ("Nanu, Nanu") ;-P
The other 2 projects are very pretty! As usual :-D
Oops, forgot to add link to the pattern for this triangle : http://tipsaroundthehome.blogspot.com/2018/07/treble-with-m.html
DeleteThank you! :X I will update this post soon with your link! :-f
Delete