The African doily is already at its second last row, you see that I'm still dithering between yellow and pink, but in this moment I like both so probably I'll keep on tatting one another colour.
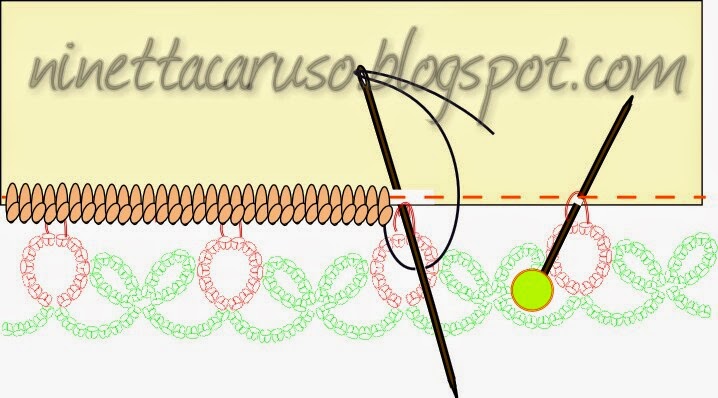
Dianire, in a previous post, asked how I attach tatting to fabric. Of course it depends on which kind of fabric, on the design, if it's an insertion or an edging.
You can find a lot on the net, I've "googled": "attach tatting to fabric" and I obtained 55.400 results! There's also a thread on InTatters.
I like suggesting you to read at least these 3 links:http://www.tatsall.ca/tips.htm#attach1
I prefer two methods, the hidden stitches and the button-hole stitch.
Ciao,
Ninetta


 :)
:)
 :(
:(
 :))
:))
 :((
:((
 =))
=))
 =D>
=D>
 :D
:D
 :P
:P
 :-O
:-O
 :-?
:-?
 :-SS
:-SS
 :-f
:-f
 d(
d(
 :-*
:-*
 b-(
b-(
 h-(
h-(
 g-)
g-)
 5-p
5-p
 y-)
y-)
 c-)
c-)
 s-)
s-)
 d-)
d-)
 w-)
w-)
 :-h
:-h
 :X
:X
First off love the changing colors of the animals keep it it is beautiful! Second, you are so talented and perfect golden hands you have :) Third so thankful for the internet and to be able to see your work
ReplyDeleteHugs :)
Thank you, you are so nice! Hugs :)
Deletecomplimenti per il centesimo post! i tuoi lavori sono bellissimi
ReplyDeleteGrazie mille, sei molto gentile!
DeleteCongratulations on your 100th post.
ReplyDeleteYour doily is looking lovely.
Margaret
Thank you :)
DeleteWow! 100! That really went fast!
ReplyDeleteYour tatting is so wonderful. Really perfection. Thank you for all your great posts and videos.
XXOO Fox : )
Thanks a lot :)
DeleteCongratulations on completing a century, Ninetta :-)))
ReplyDeleteI love your monsoon-themed version of the doily -- a very fresh feel !
Very clear & easy-to-follow tips & schematics.
Here’s wishing you many many more happy hours (and years) of blogging & sharing :-)
Thank you very much, I appreciate a lot your thought as you're an expert of tips!
DeleteOh dear me. You do know how to pull my leg, don't you, Ninetta ?! ;-))
DeleteI love your blog muskaan!
DeleteCongratulations on your 100th quality post, Ninetta!!
ReplyDeleteDo you know how they say 'point clair' in English?
Thank you Tally! I don't know, maybe could it be the same as the ladder hem stitch? Have you a link to an image?
DeleteI would love to make some tatted trim and then attach it to something!
ReplyDeleteYes, I know... Elisabeth would love a tatted hanky! :)
DeleteYour doily is looking wonderful!!! :)
ReplyDeleteThank you very much, as always you have nice words for me, hugs :)
Delete100 posts! That's a milestone! Thank you for all you post as you inspire the rest of us.
ReplyDeleteMelanie
Thank you dear Melanie!
Delete