Translate

====================

====================
Dear Reader,
I share here what I like and what works for me. If you've been following me, you know that I can change my mind from time to time, and feel free to comment that I'm completely wrong, you may be right. I'm not running a business. I'm not paid and have never received any compensation or facilitation for any review/brand/site here mentioned. In case one day we'll ever meet, I'll be the one offering you a cup of Italian coffee, too.
====================

Tuesday, 28 August 2018

spiral rings with treble tatting

This is how I tat the spiral rings with tds in place of ds, just like the spiral rings by Lenka Hašková, showed in previous post: the spiral ring by Lenka
treble tatting tds
For the spiral ring in that picture, with treble tatting stitches:
  1. start a ring with one double stitch
  2. tat 8 tds (that is: I finished just after the 8th, didn't tat any other ds after that) (*)
  3. insert the shuttle inside of the loop, from front to back, before closing the ring (**)
  4. close the ring.
    treble tatting tds
  5. Then, the thread is passed to the back side and pulled upwards. You see, from the next picture, that there is a little bare thread appearing between each tds, so we have a very small picot every each tds that plays hide-and-seek. I will call it the "hidden picot".  
  6. Pull the thread toward the hidden picot between the fourth and the fifth tds. Then block the spiral in position with a lock join.
treble tatting tds

(*) The number of tds can vary, of course, it depends on the pattern.
(**) The spiral can be oriented in the opposite direction, just don't insert the shuttle inside of the loop, from front to back, before closing the ring.

Depending on the pattern, any of the "hidden picots" can be used to block the spiral in position.
Beads can be added, too. I didn't took any picture, though.

treble tatting tds
I tried another version, combining ds and tds in the same spiral ring. In previous picture, I started with 13 picots separated by 1 normal ds each, then I tatted one last tds, posted the shuttle inside the loop and blocked the spiral, locking the thread in the 7th picot. The height of the picots and the last tds make the spiral look like previous all-tds spiral, but tatting this one is way too faster than tatting all tds!
treble tatting tds

The spiral rings with tds are part of the little motif showed here: fun swirly effect in treble tatting
treble tatting tds
(They resemble those cute aquarium snails, called Planorbis... 🐌🐌🐌🐌🐌🐌)
In that motif, the "hidden picot" is between the third and the fourth tds.

I'm planning to share the pattern, starting from next week. I hope that someone of you wish to tat-along with me and I really hope to have any feedback, too.

If you like, you can start now, as the pattern starts with a lanyard of spiral rings. Actually, there are 14 spiral rings. At least, if not my motif, with 2 detached set of 2 or 3 spirals, you will have a new pair of earrings 🙇 !
treble tatting tds
I admit... that tds aren't fast tatting, definitely.
It is just like when we did the very first "flip", tricky at first but so addictive. Me too, I need more exercise.

Thinking aloud: it seems to me that tds can be used in place of double stitches in a various set of tatting techniques: rings, chains (even in place of picots), block tatting, mock rings, split rings, maltese and pearl tatting, 3D, beanile, ANKARS,... I've just scratched the surface. I need more time to try and share everything, but I know that I'm not alone. Thanks to other nice tatters, who generously share their experiments! Like Muskaan, that already shared her tips for treble tatting! 🤩
I'm a shuttle tatter, but it can be done also in needle tatting (I've put a video in YouTube to show my way to do it). I can't wait to see designers using it 😍 💌🌹

Ciao,
Maybe, you didn't know that "ciao" it's used in place of both "hello" and "bye" and I've learnt that we've used this word in the current way only for a couple of centuries, from the early nineteenth century, so it seems it is just as old as tatting 😍.
Ninetta

Tuesday, 21 August 2018

the spiral ring by Lenka

How to tat the spiral rings by Lenka Hašková, showed in previous post.

I've saved her neat and delicate tatting, she sent me in 2015:
I asked her permission to write a tutorial in my blog and she kindly agreed.
She also agreed to call it "the spiral ring", but I'm sorry, forgive me if I call it Lenka's ring! You can find her blog here: frivolenka.blogspot.com, please, take a minute to visit her and say a thank you!

In order to tat Lenka's spiral ring, I learned that:
  • Only one shuttle is needed.
  • Lenka's "spiral ring" is a normal ring, with at least one picot, twisted and blocked in position through one of its picots.
  • After closing the ring, the thread is passed to the back side and pulled upwards,  toward the picot. Then block the spiral in position with a lock join.
  • The picot used to block the spiral in position, may vary in size. That determines the distance between spirals. If you want a lanyard of spiral rings very close to each other, the picot used to block the spiral must be very small.
  • "To post or not to post" shuttle: not the hamletic doubt, but inserting or not the shuttle inside of the loop, from front to back, before closing the ring, that sets the direction of the spiral effect (clockwise or counterclockwise)
  • Any ring can be twisted in this way, as long as there is a picot in it, in any position on the outer spiral; the twist is made only after the ring is closed.
  • As a design element, it is like a single shuttle split ring, where the starting point and the ending point are not at the same point. 
  • It has a front and a back side, because it is just like the nineteenth-century method of tatting a lanyard of rings with bare thread in the middle, in order to climb to the next ring in the line.
  • Beads can be added inside the loop for the ring, too. A bead (or more) can be trapped at the base of the ring to emphasise the twist. 
  • Just after that the ring has been closed and before the lock join, bead/beads can be added in the bare thread between the base of the ring and the join, to put an accent in the centre of the spiral ring.
Thread in my photos is DMC Cebelia n.10. Beads are 9/0. (And ds stands for double stich, as usual.)
In the next collage, I started a ring, putting a bead inside the loop, and tatted 6ds, then a picot, then 6ds more. You can see from the third pic in the collage, that I posted the shuttle inside the loop,before closing it:
So, there I got a normal ring, with a picot in the centre and a bead trapped at the base.

In next collage the spiral is appearing: I put the thread behind the ring, that's the back side from now on, then pull it (in the meantime you hold firmly the thread at the base of the ring) and slide a bead in the bare thread between the base of the ring and the picot, then lock join to the picot.
In the next collage you can see, on the left, the spiral ring completed, the front of the spiral is clockwise. On the right, there is also a second spiral, started over the first, just after the lock join, this time I tatted a ring of 8ds, then a picot, then 6 ds, then, before closing, again I inserted the shuttle inside the loop.
In the third spiral ring, I didn't post the shuttle, closed the ring, then put the thread behind and pulled it upwards toward the picot, so the spiral ring flipped over its vertical axis and it looks counterclockwise:
On the right of previous picture, you see that I didn't put beads in the last spiral ring, the twist is clear indeed.
The size of the picot used to block the spiral in position, determines the distance between spiral rings. I wanted my last spirals very close to each other, so I made a very small picot in my last two spiral rings...
That is a delightful and interesting method and I think it can be a nice effect to learn and use in patterns. I hope that you like it and wish to play with it. Many many thanks to Lenka!

In my next post, I will show you how I tatted the spiral rings with treble tatting stitches in place of traditional double stitches.

Ciao,
Ninetta

Tuesday, 14 August 2018

fun swirly effect in treble tatting

That swirl effect makes me smile!
treble tatting tds

Those lilac swirls are tatted with one shuttle only, they are rings, one ds and 8 tds, then close without any other stitch or picot. That was the first round I've tatted, then I added the yellow centre and, next, the outer round. I left a lot of picot there, do you think we need another round?
treble tatting tds

Thread is Anchor, size 70, very nice and soft. That is a very welcome gift, from Maria, a beginner who started tatting in January but loves tiny threads and already tats with size 80! Thank you Maria, for your enthusiasm!
treble tatting tds

Butterflies have the "body" in treble tatting, tatted with the yellow thread encapsulated in the green chain, of course that means the last round is tatted with 3 shuttles (or 2 shuttles and one ball). I tatted in direct tatting and needed 3 shuttles, also yellow tds are tatted in direct tatting. Wings are floating rings, one has tds, too.
treble tatting tds

If any of you like this pattern and wish to replicate it, I may post it here as text, or, alternatively, I can make up a tutorial (with pics, etc) for a tat-along. I could add rounds, I've not decided, though. What do you think?

The swirl ring effect is something that I've learned from Lenka (her blog is frivolenka.blogspot.com). She sent me her tatting with those rings, some years ago, but I can't find a technique's name, neither a site where the technique is explained. At least, nothing in English or Italian! I don't know if it is her own original idea, anyway I like calling it "Lenka's ring"!  Thank you, Lenka! If any of you have infos about it, please let me know, I'd be happy to learn and update this post with a link!
It is a one shuttle pattern: after closing the ring, you pull tight the thread under and upward, then lock join to a picot on the opposite side, actually you let the pattern "grow" to the head of each subsequent ring. I've only my earrings to show you, tatted some time ago:


✨✨✨✨✨✨✨ Buon Ferragosto! ✨✨✨✨✨✨✨
"Ferragosto": another star
Ciao,
Ninetta

Tuesday, 7 August 2018

tds in direct tatting - or reverse treble tatting

Treble tatting in direct tatting (or reverse treble tatting).
treble tatting tds

I recommend first watching other videos on how to tat the "Treble Tatting".
Link to current video: https://youtu.be/g2aSo08zAh4

The aim here it isn't to present a pattern, there isn't the same number of stitches in different chains. The video starts where I have already tatted a split ring (5ds/5ds), one chain in direct or reverse/unflipped ds and reverse tds (that is 2 reverse order ds unflipped, 1 reverse tds, very small picot, 2 reverse order ds unflipped), then another chain in normal tatting (that is 2ds, 1tds, very small picot, 3ds).
Then I tat 2 reverse order ds unflipped.

Plan ahead some more space than your usual, for the loop around the hand.

1. Start with a very small picot and one reverse order ds unflipped.
2. Laying the picot across the shuttle's thread, pull up a loop through the picot.
3. Keep the loop opened and in place (I put thumb inside)
4. Now slip the shuttle through the loop thus formed, from the bottom up. Don't tighten it, yet.
5. Now slip the shuttle behind the thread around the hand, from the bottom up.
6. Then pass the shuttle from bottom up, through the loop thus formed, 3 times.
7. And then, slip the shuttle back through the loop around the thumb, from top to bottom.
8. Tighten the shuttle's thread and don't let the other thread slip out of place.
9. Then, pull the thread around the hand.

Then, in the video, I tat another very small picot and one reverse order ds unflipped. Another reverse tds can be started from there.

Passing from reverse tds to reverse order ds unflipped, always leave a short picot, same height of the tds.

Thank you for watching.
Ciao,
Ninetta

🍦🍦🍦🍦🍦🍦🍦🍦🍦 ITALIANO 🍦🍦🍦🍦🍦🍦🍦🍦🍦

Punti alti a chiacchierino - nodi al contrario.

Raccomando di guardare prima gli altri video su come fare il punto alto a chiacchierino.
LINK PER QUESTO VIDEO: https://youtu.be/g2aSo08zAh4

Il video comincia nel momento in cui devo fare un arco in cui è presente il punto alto al contrario. Ho già fatto uno "split ring", un arco con nodi al contrario e un altro arco con nodi normali. LO SCOPO DI QUESTO VIDEO NON E' QUELLO DI MOSTRARE UNO SCHEMA, gli archi hanno un numero di nodi variabile. Faccio 2 nodi doppi al contrario e poi inizio il punto alto al contrario:

Fare il giro attorno alla mano un poco più largo del vostro solito.

1. fare un pippiolino molto piccolo e un nodo doppio al contrario.
2. Prendere un'asola di filo posizionando il picot sul filo della navetta e tirare il filo verso l'alto, attraverso il picot.
3. Quindi, lasciare quest'asola aperta, io l'ho messa sul pollice.
4. Passare la navetta, dal basso verso l'alto, dentro quest'asola appena fatta.
5. passare la navetta dietro il giro attorno alla mano, dal basso verso l'alto
6. passare la navetta, 3 volte, dal basso verso l'alto, in questo spazio tra il filo della mano e il filo della navetta.
7. Ripassare la navetta dentro l'asola attorno al pollice, stavolta dall'alto verso il basso.
8. tirare la navetta per chiudere l'asola e lasciar arrotolare il filo.
9. sfilare l'asola dall'anulare e tirare il filo attorno alla mano per "chiudere" il punto alto.

Nella seconda parte del video ho fatto anche 2 punti alti al contrario vicini tra loro. Un secondo punto alto parte dal picot accanto al punto. Passando da un punto alto ad un nodo doppio tradizionale, lasciare sempre un picot della stessa altezza del punto alto.

Vi ringrazio anticipatamente, nel caso che vogliate guardare il video.
Ciao,
Ninetta

Wednesday, 1 August 2018

reverse treble tatting video - tds on the second side of a split ring

Treble tatting on the second side of Split Rings (or "reverse treble tatting").
treble tatting tds
I recommend first watching other videos on how to tat the  "Treble Tatting".
Link to current video: https://youtu.be/zYzdgQYFv00

In the video I show a bracelet with split rings that have tds on both sides. Pattern is at the end, original @Antonina Caruso 2018. (Pearls are sewed on afterwards, rocailles 11/0 are loaded on both shuttles). Thread is Finca metallic gold colour 0006 n.2/C, doubled (very similar to a size 20 thread).
treble tatting tds

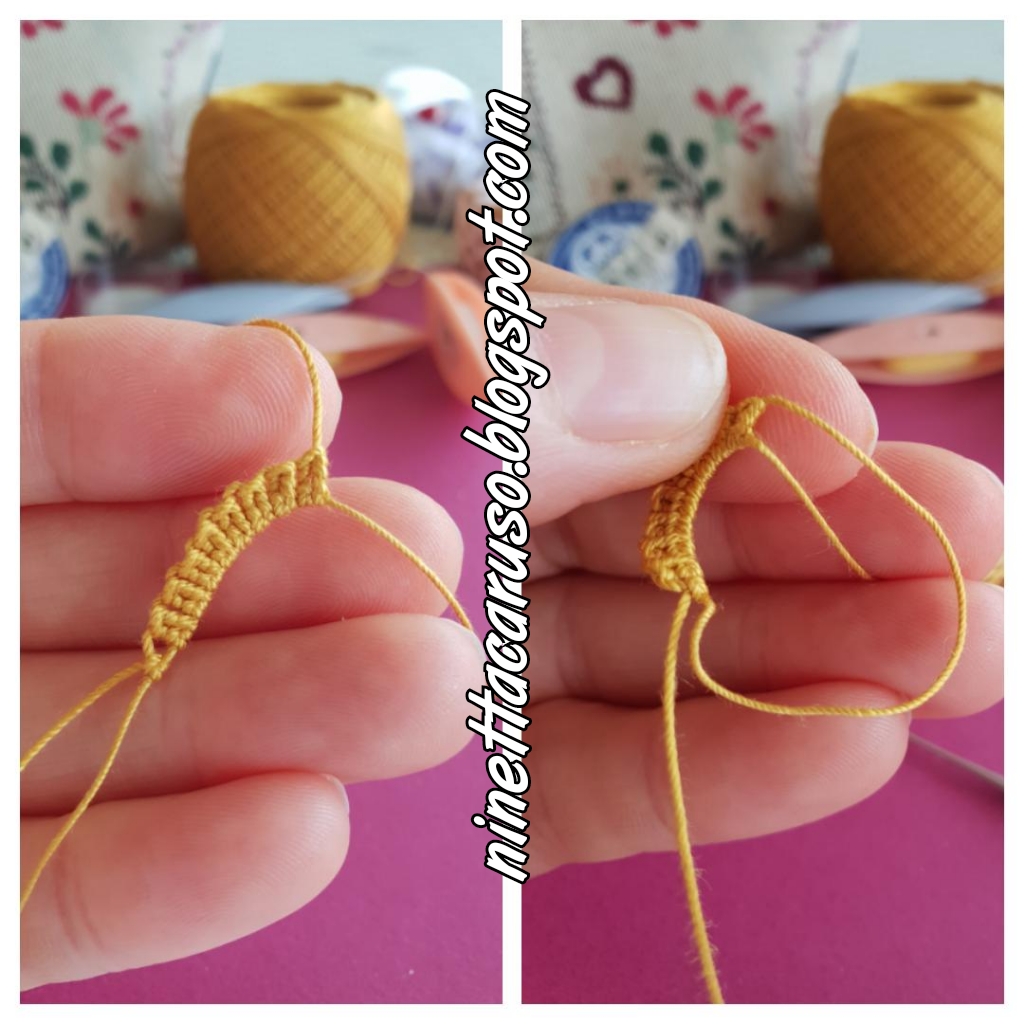
The video starts where I have already tatted the first part of the SR, that - in the video - it is 2ds, then 1tds, very small picot, 2ds. Then, on the second side of the SR, I have already tatted 2ds. Then, I'm going to tat the reverse treble tatting stitches.

Plan ahead some more space than your usual, inside the loop around the hand.

1. Start with a very small picot and one double stitch.
2. Laying the picot across the second shuttle's thread, pull up a loop of thread through the picot.
3. Keep the loop opened and in place (I put thumb inside)
4. Now slip the shuttle through the loop thus formed, from the bottom up. Don't tighten it, yet.
5. Now pass your ring finger in front of the loop around the hand.
6. Now slip the shuttle through the loop around the hand, from the bottom up.
7. Then pass the shuttle from bottom up, through the loop thus formed, 3 times.
8. And then, slip the shuttle back through the loop around the thumb, from top to bottom.
9. Tighten the second shuttle's thread and don't let the core thread slip out of place.
10. Then, pull the core thread around the hand (don't pull the core shuttle, yet!).

Then, in the video, I tat another very small picot and one double stitch. Another reverse tds can be started from there.

Passing from tds to ds, always leave a short picot, same height of the tds.
Then, you'd watch me while I'm making another ds and closing the split ring, just pulling the core shuttle.

A very similar method can be used for direct tatting (another video will follow).

Tension can be an issue. Nothing new for tatters!

Beads can be added, in the second side of the SR, too! For the bracelet: rocailles have been loaded in both shuttles. For each SR: 3 beads go inside the loop and are preloaded in the core shuttle, 3 beads are preloaded in the second shuttle and moved in place while tatting the second side of the split ring.

Pattern:
treble tatting tds
ds=double stitch;
rs=reverse double stitch;
tds=treble tatting stitch;
rtds= reverse treble tatting stitch;
b=bead on picot.

Repeat for the desidered lenght:
SR: 3ds, b, 1tds, b, 1tds, b, 3ds / 3rs, b, 1rtds, b, 1rtds, b, 3rs: close.

Thank you for watching.
Ciao,
Ninetta

🍉🍉🍉🍉🍉🍉🍉🍉🍉🍉🍉🍉ITALIANO🍉🍉🍉🍉🍉🍉🍉🍉🍉🍉🍉🍉
Punti alti a chiacchierino nella seconda parte di uno split ring (anello spezzato - nodi al contrario)
LINK PER QUESTO VIDEO: https://youtu.be/zYzdgQYFv00
Raccomando di guardare prima gli altri video su come fare il punto alto a chiacchierino.

Il video comincia nel momento in cui devo fare il punto alto al contrario. Ho già fatto la prima parte dello "split ring" e ho cominciato la seconda parte facendo 2 nodi doppi al contrario. Inizio il punto alto al contrario:

Fare il giro attorno alla mano un poco più largo del vostro solito.

1. Fare un pippiolino molto piccolo e un nodo doppio al contrario (con la seconda navetta).
2. Prendere un'asola di filo posizionando il picot sul filo della seconda navetta e tirare il filo verso l'alto, attraverso il picot.
3. Quindi, lasciare quest'asola aperta, io l'ho messa sul pollice.
4. Passare la seconda navetta, dal basso verso l'alto, dentro quest'asola appena fatta.
5. passare la seconda navetta dentro il giro attorno alla mano dal basso verso l'alto
6. passare il dito anulare davanti al filo attorno alla mano, fuori dal giro. Si crea uno spazio tra l'anulare e il filo della seconda navetta.
7. passare la seconda navetta, 3 volte, dal basso verso l'alto, in questo spazio.
8. Ripassare la seconda navetta dentro l'asola attorno al pollice, stavolta dall'alto verso il basso.
9. tirare la seconda navetta per chiudere l'asola e lasciar arrotolare il filo.
10. sfilare l'asola dall'anulare e allargare il filo attorno alla mano per "chiudere" il punto alto.

Nel video ho fatto 2 punti alti al contrario. Un secondo punto alto al contrario riparte dal pippiolino fatto accanto al punto precedente. Passando da un punto alto ad un nodo doppio (sia normali che al contrario), lasciare sempre un pippiolino della stessa altezza del punto alto.

Un metodo simile si può usare per lavorare gli archi al contrario. (Seguirà un altro video).

La giusta tensione del lavoro è importante, come in tutte le altre tecniche del lavoro a chiacchierino.

Possono essere aggiunte perline, anche nella seconda parte di uno split ring.

Lo schema per il braccialetto è una sequenza di split ring con rocailles 11/0, della lunghezza desiderata. Le perle swarovski sono cucite a parte, dopo aver finito il lavoro a chiacchierino, le rocailles, invece, sono tutte caricate sul filo delle due navette (metà e metà). Ogni split ring è così fatto:
Prima parte dello split ring, con la prima navetta: mettere 3 perline nel giro della mano, 3 nodi doppi, far scorrere una perlina nel picot necessario per il seguente punto alto, quindi un punto alto; altra perlina nel picot successivo e punto alto, altra perlina nel picot di passaggio tra il secondo punto alto e il nodo doppio successivo, altri 2 nodi doppi.
Seconda parte dello split ring, con la seconda navetta: 3 nodi doppi contrari, far scorrere una perlina nel picot necessario per il seguente punto alto al contrario, quindi un punto alto al contrario; altra perlina nel picot successivo e punto alto al contrario, altra perlina nel picot di passaggio tra il secondo punto alto al contrario e il nodo doppio contrario successivo, altri 2 nodi doppi contrari.
Chiudere il cerchio, tirando il filo della navetta principale.
treble tatting tds

Vi ringrazio anticipatamente, nel caso che vogliate guardare il video.

Ciao,
Ninetta
UPDATE: Please refer to the page "Treble Tatting Stitch - Summary" - https://ninettacaruso.blogspot.com/p/blog-page_95.html for any info about treble tatting stitches, thank you.

Thank you very much for all your nice comments.

Ciao
Ninetta