Translate

====================

====================
Dear Reader,
I share here what I like and what works for me. If you've been following me, you know that I can change my mind from time to time, and feel free to comment that I'm completely wrong, you may be right. I'm not running a business. I'm not paid and have never received any compensation or facilitation for any review/brand/site here mentioned. In case one day we'll ever meet, I'll be the one offering you a cup of Italian coffee, too.
====================

Wednesday, 29 July 2015

july is finished

... and so the bookmark, even you all there outside have been keeping me distracted with great tips and inspirations from previous post! As a result, this time the tail is very short!!! I think I'd start a bracelet, but with thicker thread. That was dmc, size 80. I added a better picture in flickr, click on image to follow the link:

https://flic.kr/p/vGaSr4

Another pic: do you recognize the similar pattern from Mrs Odum's daisy?

This is the back:
...and the tail, where I played with a sort of vertically curled rings, that is first I tatted a daisy (all rings 6-6-6-6) with the red-purple thread and those little rings 6ds with the white, in the same manner that I did them in the tail but around the thread over the hand; then I tatted rings 6 vsp 12 +(join to vsp) 6, "hugging" two contiguous purple rings:
... the back of the daisy:

Love those colors together, they are similar to colors of this flower that I bought, but sorry I can't remember its name:

I'd also like showing a panorama, in the back you can see the Gran Sasso mountain, the highest in the center of Italy. It's taken from a place used to be populated till 1960s, then emptied for emigration and a lot of house ruined because people never came back.
There's a lovely silence, only birds and wind, most time of the year. Then some of the houses get to life again in August, when people, usually sons or grandsons of old residents, come on holiday.

Ciao,
Ninetta

Tuesday, 28 July 2015

who needs beads?


Disclaimer: tatting mock beads with size 80 thread, instead of using real beads is just an insane personal choice... You're warned. Moreover, handmade tatted beads could differ in size due to tatter's mood and irritability, but could also differ in shade due to hand washing soap unavailability. Ugh!

Thread dmc size 80, worked with 3 shuttles. Split rings, 3rd thread is carried inside the second half of each split ring.

Ciao,
Ninetta
Related post 

Monday, 27 July 2015

absent minded

This post was supposed to be published on 21th... Uhm, forgetting a post wasn't in that list ( http://www.buzzfeed.com/robynwilder/problems-all-absent-minded-people-will-relate-to ) !
~~~~~~~~~~~~~~~~~

July flied.

Here has been very hot, hands have sweat for all the month and tatting has been slowed down. Even during those two days of the event organized by our local association, on 11th & 12th of July , I didn't tat, but chatted a lot. It was a nice time, with friends who kindly came, despite boiling - for our standard - temperatures. There's a nice photo-reportage in a friend's site here: www.merlettoitaliano.it
I'm in some of the pictures, wearing a blue top with tatting on, the same tatting that I move from one top to another, as long as I put on weight and grow in size!


Actually I started something, just because of my personal challenge: tatting a bookmark per month.

Thought about a starfish, then changed my mind because I tried to twist a long chain and couldn't remember what I wanted to do.

So I started a chain of split ring with layered rings on, but I forget shuttles somewhere here around. It was a great opportunity for tiding up my tatting corner in the kitchen...

I found a prototype of quad_2, it looks to me like a round of minnows surrounded by starfish, a very summer subject, so I started one bookmark with that pattern. Actually, when it came to the pattern, I found an oversight, that means the pattern needs to be rewritten. Sigh! I'm so sorry, "lack of concentration" status is a constant in my life...


Then, completely discouraged, I started playing with curled rings again. It seems that I found a rithm now. It could be, maybe, the starting of the bookmark of july, and we are already at the end of this month. I can't let me distracted any more. Can I do it?

Ciao,
Ninetta
~~~~~~~~~~~~~~~~~~~~
(Yes! I finished it!)

Sunday, 5 July 2015

the chicken and the egg

Prologue.
Last summer I received a vintage collar tatted with a silk thread, which had belonged to one of my many aunts for decades, tatted probably between the two wars. I've been so happy to share the pattern and tat it again to grasp old hidden tatting secrets, the way the old tatter choose to cope with rings and chains. It could have been original or may be not, I don't know, but the pattern actually it is simple, fast and attractive.

The story.

I've still browsed Pinterest, even if I don't rather pin.

There're more and more broken links but a lot of inspirational artworks. Following active links, I've discovered a discrete amount of copied books, a pity, but at least in one case I'd like to share a positive feedback: I got to know via Pinterest the existence of a book by a Czech lady, "Frivolitky" by Milena Tomkova published in 2003, 70 pages. In one page, pinned by someone, I found the same pattern of the collar. Of course I rushed to look through all pages and it's a lovely book, with many motifs' patterns, it would be worth to buy even I can't read czech. I googled it but I couldn't learn if it's available.

Epilogue.
Considering that it can't be assumed that the collar's pattern was original, nor I can say if the book is a collection of vintage patterns, neither someone could know if their grandmother born first than the one who tatted the collar... I don't know if it's fair to leave the pattern in this blog or not. What do you think? Is it a silly question, like the chicken and the egg? What should I do?


I've very little tatting and sewing to show, no progress on Anne Orr's doily, no ideas for a bookmark for july... Small coin/shuttle purses that I've sewn for a lacemakers' meeting, it will be held next weekend in my city. I've played with rings vertically curled, too.

Ciao,
Ninetta

Googling "frivolitky Mileny Tomkove" I found this site where it is possible to order the book, even if it's not so clear to me how to...
 http://www.volny.cz/vtomek/  
(in the page "Literatura")

Saturday, 27 June 2015

solution or pollution?

Hand-made tatting pollution, I mean, with a massive help by scissors - but eventually the solution came...

I loved Muskaan's saga on curled rings: every curled ring alternative has been unfolded (part of which ignored by the designer herself) and intriguing hypothesis rolled out.

She mentioned that a curled ring must be sized to be curled, she's right, in fact a ring smaller than 20ds it'd be difficult to fold. But the "why-not" question, about how to curl little 6-6 rings, was intriguing.

I've played around little rings without a clear direction or pattern in mind, it seemed they were really too little to be folded.

And the "what-if" actually came from tatting with beads, how they can be placed in the thread round the hand and trapped at the base of a ring.


A lot of trials and errors this time! But if at first you don't succeed, try and try again. Even Lizbeth teased me! They 've made a weaver's knot in one strand... (thread is size 80, Lizbeth colour 122 and yellow dmc colour 744) Sigh! Anyway it's a tatting game, I love it.


I only have to hide and cut ends and it's finished.

So, I'm happy with my new bookmark-of-the-month and with the 3D curled effect too. What can I do, I can't help producing tatting pollution...

Ciao,
Ninetta

P.S. I tested my new celtic tatting shuttles but it's been wasted more of size 80 thread. The thin shuttle is not so thin to pass even through a 32ds ring. It asked for a second attempt with thicker thread. Solution or pollution again?

Thursday, 18 June 2015

glutton

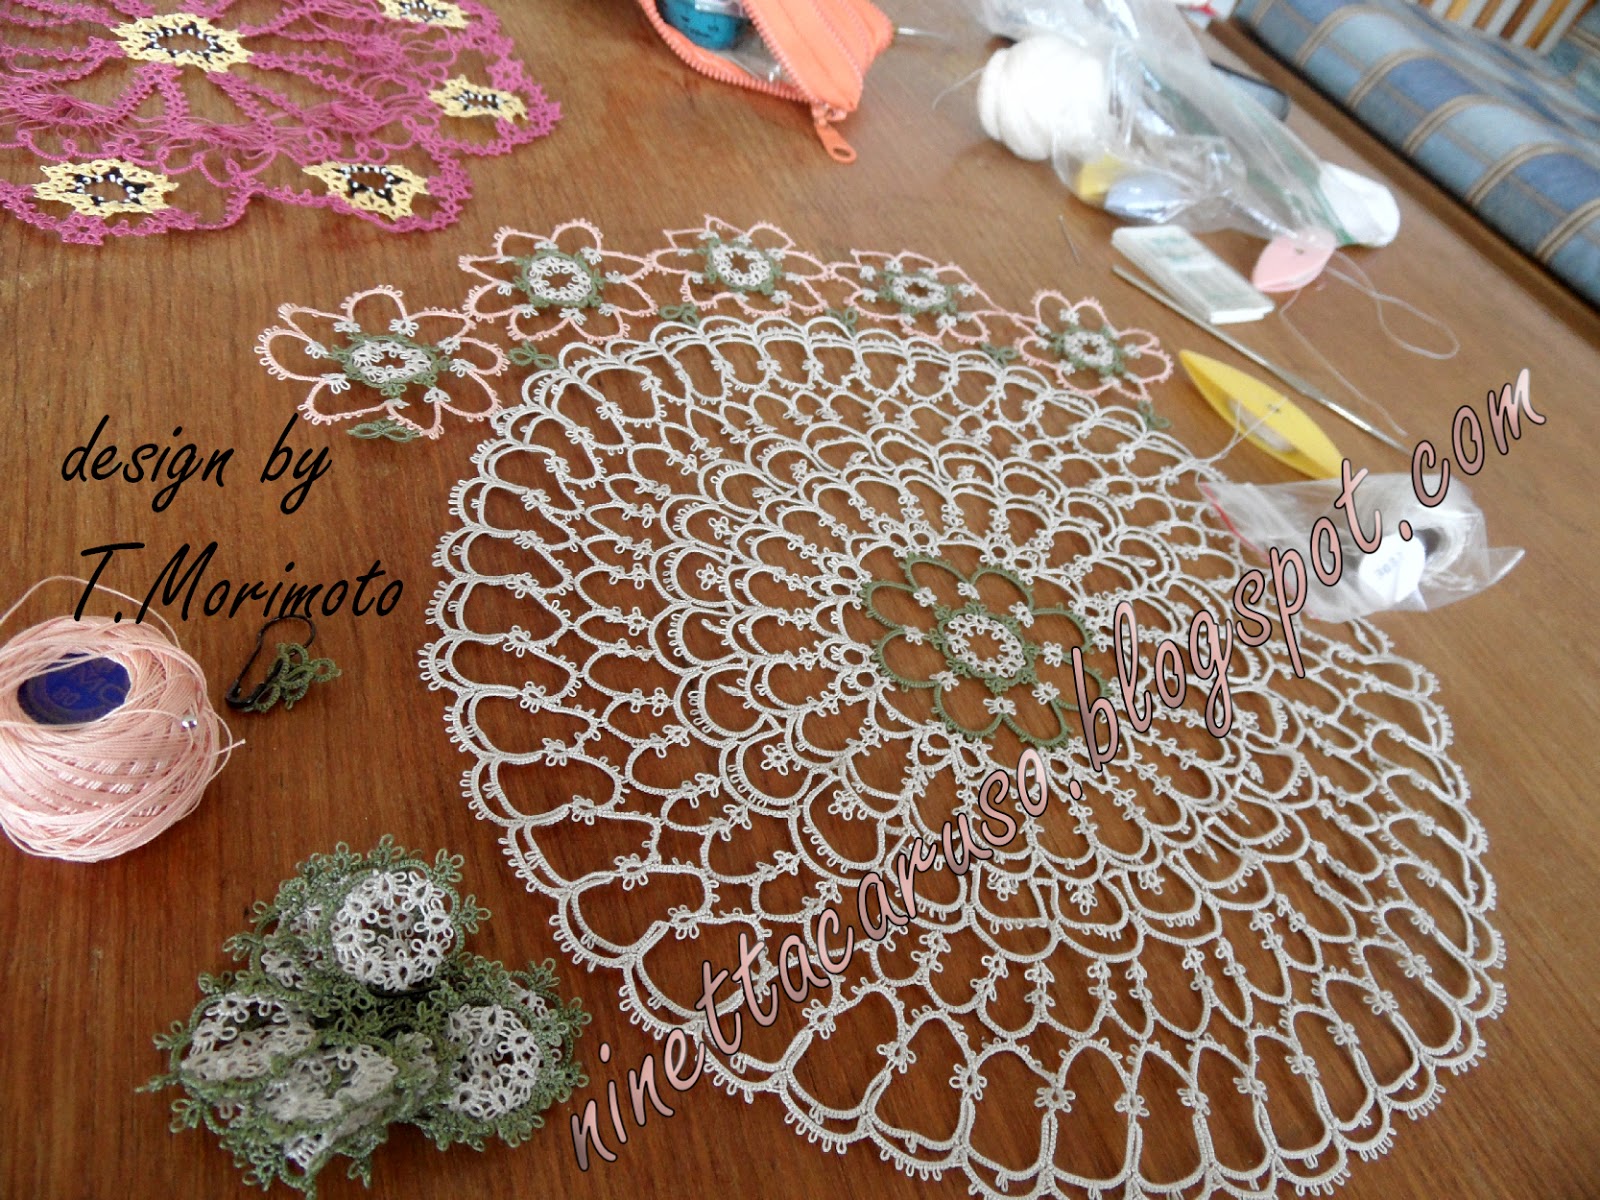
You wouldn't say because of the tiny thread, but it's a glutton! It overate two balls of dmc Special Dentelle size 80, colour number 3033 (it's a light mocha), then, not full, some of same size and brand, colour number 754 (a pink hue) and all remaining bit of a green hue, colour number 3052.

These are some missing picots, missing ds, missing mind...

And here it is the Morimoto's last round, still not full of thread, it wanted more of it for the last 3 repetitions but I made do with what I had. Not enough to complete the round. What a lovely justification to go shopping!


But in the meanwhile, Dr. Downplay had a brilliant idea, in that way nobody will ever know our "terrible" secret!!
The doily is quite big as the mystery doily (that was tatted with thread size 40) and it's lovely, I really like how it turned out! Thank you Tomoko Morimoto (the designer)!

I bought a "virtual" version of her book, anyway Google still didn't persuade me that I own a copy because I can only access it when I'm connected to the web. Two days ago, I hadn't connection for unknown reasons, nor I could read the book :(
There're advantages too: no dust on it, more space in the shelf, zoom on text and images (that's a wonderful thing when you start having sight problems)!

This is a link to find her book in Google Play Books: New Tatting : Modern Lace Motifs and Projects

Ciao,
Ninetta

Thursday, 11 June 2015

better late than never

Only 3 flowers more and I'll finish this round. Then there are 2 rounds of chains and it will be done.

But I'm absolutely unsatisfied with the closure, too bulcky... Ahh! Mr. Meticulous! Go away!!


I remember that Edda Guastalla once showed in facebook her method to add the second colour at the start. I usually follow Jane Eborall's method (2nd thread added at the base of the ring, without knots), anyway I thought that Edda's way could have been used to refine the join at the end, instead of being used at the start. She leaves a loop at the start where she inserts the second thread.

I've tatted the flower stand alone as much as possible, then, after 6 petals (and one hour!! I was fast this time) it's time to attach it to the biggie.

I've been using the suspended chain method to hide the core thread. Then I have a loop that it's  being inserted in the starting left loop. Blocked the SSSCH with the ball thread, then I pulled first the core thread then the starting loop. I left a long tail to the ball thread because I sewed it on the back.


I'm a little happier now. I've learned a bit more with this doily.

Have you seen? I've learned FS/BS tatting, too! Better late than never!

Ciao,
Ninetta

Monday, 8 June 2015

Mr Meticulous and Dr. Downplay

It seems that I'm going to complete my WIPs from the last started to the first. I've finished the "forget-me-not" doily and I went back to the second started one. The first started, the centerpiece by Anne Orr, is still waiting the thread, but a bird told me that Lizbeth size 80 arrived in Italy and took me 3 balls too, col. 154, 184 and 122! (bird's name is Maria, thank you dear!) Unfortunately, still without the col. 131...

https://flic.kr/p/uijeGt


But something worryingly happened with Morimoto's doily.

In the late hours of one night, Mr Meticulous cried with horror and fainted as soon as he looked at the missed picot. Tragically, the doily let him put itself in a box.

Under the cheerful sunlight of the next day, Dr. Downplay couldn't find anything wrong and merrily added some flowers...


Ciao,
Dr. Downplay

Friday, 29 May 2015

trapped in repetitions


But not the same repetition, of course! One of this, one of that...

In the picture you can't see 2 doilies hidden in a pochette but you see the other one in the plastic sack, last rounds are being the same repetition again and again, but I can't wait to see the final look.

Then there's the edging for Giulia, she asked 2 meters to trim a traditional costume with, it would have been rough and ready, so I used a Cebelia size 10. Pattern is from "A tatter's workbook" by A.Tatter. I discovered that my tiny shuttles can load thread for only 10cm of that edging, I needed to buy the Starlit, that compared with them, it looks like a giant!

Then there's a distraction, a beaded bracelet that really it is just a matter of repetitions. I'm happy with it, but I don't know if I'll ever do another one.

I bought the Starlit on last saturday, and received as a gift those celtic shuttles, upper side of the picture. (Would you like to suggest a pattern or should I put the fun off until the next bookmark?)

I was enjoying a lace makers meeting, one hour from where I live. I admired an absolutely amazing exposition of laces from different parts of Italy, needle laces, bobbin laces and netting. There are some photos of the event in facebook (held in Zagarolo near Rome). As example, here it is a piece of needle lace from Burano, near Venice, it was done by a very talented lady, Angela Coggiatti, that lived from 1895 to 1982. (Sorry for the pic it's not very clear but the lace was behind a glass)


That's me (the chubby one on the left, but I also had a bag under the jacket!) and my friend Bibiana:


Ciao,
Ninetta

Friday, 22 May 2015

mediterranean tatting diet

A lot of fresh vegetables, flowers and fruits. It's healthy, enjoyable and relaxing.


That's splitted, folded, curled, rolled, encapsulated and tatted up. Now I'd better finish my 3 WIPs!


Thread dmc size 80. Split rings, folded rings, curled rings, S-chain.

Ciao,
Ninetta

Tuesday, 19 May 2015

part VI - only one more

I've only this post and I'll stop posting about the forget-me-not doily, only one more round and forget it! May I show you the finished doily? Only one more post/pic then? Thank you for bearing with me...

The other day I was surprised by that four-leaved clover in one of my flower-pots! No teasing and no glue up there! So unusual! I think the clover wanted to say "only one more" too!

Last round:
1 - Climb up to the last round with a SR: 3-3/3-3
2 - tat another SR: 3-3/3-3, then another one but this time the second picot it's a long one, I used the 1/2" plastic stick horizontally
3- then tat 4 SR more, these SR are all equal: 3-3/3-3, they're all the same all around

Then start the first little daisy (there are 3 daisy around each yellow flower):

4&5 - one SR, then with SH1 one Ring joining the first picot to previous SR (all rings are all 3-3-3-3, so I won't repeat this again), then another ring joining the first picot to previous ring and the central picot to the yellow flower, then another Ring just the same

5 - with SH2 one Ring (you would reverse work here, tat the ring then reverse again to continue)

6 - with SH1 one SR, joining both side to previous rings. Then 3 SR, then start another SR (part of next little daisy), with SH1 one ring joined to previous ring and to the yellow flower, then with SH1 another similar ring. With SH2 (reverse work) 2 rings. (Reverse work again) Tat the last SR of the little daisy.

7 - continue with 3 SR (with SH1), another daisy mirroring that one in pics 4&5, then four SR again. Part between yellow flowers: tat one SR with a long picot on the flipped side (the same gauge, 1/2" plastic stick used horizontally), then another SR with normal picots.
Then to connect this SR chain to previous round: one Ring, join the central picot to previous round at the base of the central ring just over the petal. Then with SH1, without reverse work, one SR joined to previous SR with normal picots and another SR joined in its not-flipped side to previous SR with the long picot. Then 4 SR more.

Restart from pic 4, all around the contour.

Ciao,
Ninetta

Tuesday, 12 May 2015

part V - threads too short to be used

One friend I've known for about four years is a tatter. She learned tatting from her mum, who died around her 90s, I can't exactly remember what her age was. She told me that her mum tatted till four days before she left this world. When they went to tidy up her tatting stuff, they found a box with this text on:

"Threads too short to be used".

A very organized Lady! So, after the cut and tie part for my doily, and laughing at myself for my little bunch of cut threads, I resolved it's time to give it to the birds outside...


Third round of the doily:
It will connect the central flower to the 8 round yellow motifs.


Start from the left in the picture:
Ring1: 6ds, join to the middle long picot of a petal, 6ds, close.
Chain1: 18ds.
Ring2: 6ds, join to next long picot of the petal, 6ds, close.
Chain2: 12ds, join the round motif (look at picture), 4ds.
Ring3: 6ds, join to next  long picot of the petal, 6ds, close.
Chain3: 10ds, join next picot of the yellow motif, 4ds.
Ring4: 6ds, join to next long picot of the petal, 4ds, picot, 2ds, close.
Ring5: 2ds, join to Ring4, 10ds, join to two petals taking 2long picots from the next petal and 2 long picots from current petal; 10ds, picot, 2ds, close.
Ring6: 2ds, join to previous Ring5, 4ds, join next long picot of the second petal, 6ds, close.

Pattern continues mirroring the other side: Chain3 mirrored, Ring3, Chain2 mirrored, Ring2, Chain1, Ring1. That is repeated all around petals.

Don't cut the thread at the end of this round, because it will be used to climb up to the last row.


Ciao,
Ninetta

Friday, 8 May 2015

part IV - petals

My coloured shuttles come in handy to name the pink one SH1 and the light blue SH2.

That is the situation in pic 1:
the line of split rings after the little daisy connected to the yellow center, it is tatted in this way:
- 4 SR (as explained in previous post) with normal picots.
- 12 SR, each one tatted wrapping the SH1 thread around the hand: 3ds, long picot (1/2"), 3ds. Then with SH2 the second side: 3ds, long picot(1/2") - except the first SR that it's joined to previous petal in its long picot. Then 3ds And close.

In pic 2 and 3, reverse work.
Start the 13th SR wrapping the SH2 thread around the hand: 3ds, long picot, 3ds. With SH1: 3ds.

In pic 4 you see the join picking all long picots with the SH1 thread.

Pic 5 and 6: Insert the picot gauge and adjust the lenght. Continue with 3ds and close (pic 7). In pic 8 the SR closed.
Pic 9: Reverse again the work and wrap the thread of SH1 around the hand.
- 4 SR with normal picots: 3-3/3-3.
In pic 10 there're 2 of those.

Pic 11: start another daisy as explained in previous post.
Pic 12: daisy connected to first round.

In next post the third round. But all 8 rounded motifs with 6 little daisy are to be prepared first. I'm going slow with those, there're 3 still to be tatted.

I hope that it's clear till now, I'll be glad to hear from you.

Remember to join the last petal to the first!

Ciao,
Ninetta

Tuesday, 5 May 2015

part III - pattern for the doily


The second round has petals with a hairpin lace effect. Actually they are split rings with long picots, all of the same size, 1/2", I used as gauge a plastic collar stiffener that it's used in men's shirts.

This round has been done with 2 shuttles wound CTM.

Start from the red point in the picture, with a normal ring, 3ds, normal picot, 3ds, very small picot, 3ds, normal picot, 3ds, close.

Every ring it's 3-3-3-3, every split ring it's 3-3/3-3.

Start the little daisy joined to the central rounded motif:
1. Split ring
2. Normal ring, join first picot to last in previous SR
3. Normal ring, join to previous ring and to central motif, see picture
4. Another normal ring joined to previous ring and to central motif
5. Normal ring, join only to previous ring
6. Split ring, join both side to previous ring and to the first SR.

Then follow 4 split rings with normal picots.

The part that follow is for the curve, that's a bit tricky, I took a lot of pics so I though to have another post for this.

Ciao,
Ninetta

Sunday, 3 May 2015

part II - pattern for the "forget-me-not" doily

Well, I see, it doesn't look good, but you can't judge a doily by its second row...

In my SH1 I've the yellow thread, in SH2 the black one.
I close the little yellow motifs in this way:

1. Finish the last daisy (complete, 1SR, 4R, 1SR). In those pics there's one motif with 6 repetitions, needed for the second last row of the doily.

2. Start a split ring (that it'll be part of the first daisy), with SH1: 3ds, p, 3ds. With SH2: 3ds, join to the first SR of the first daisy (see it in pic), 3ds, close.

3. SR closed.

4. Start the last normal ring with SH1: 3ds, join to previous SR, 3ds, join to previous daisy in the fourth ring, 3ds, join to the very first ring (Jane Eborall has a method to avoid the twisted picot for this last join, look through her Tips&Techniques). Then 3ds and close.

5. I used two loops of thread for hiding ends with the magic trick, but I'm anxious, I'm always afraid that ends pull out, then I tied another knot...

In the doily there's one central motif with 8 daisy repetitions and another 8 more motifs with 6 daisy repetitions, that need to be prepared in advance.

For this tutorial I'm having a lot of fun with mobile apps! I'm using PhotoCollage and PhotoEditor, it's amazing that you can get so much editing power from a phone. It's smart indeed!

Just to have a chuckle, if you ask for a "phon" (without the "e" that is) in Italian, they will bring an hair-dryer. You're warned.

Ciao,
Ninetta

Thank you very much for all your nice comments.

Ciao
Ninetta