Translate

====================

====================
Dear Reader,
I share here what I like and what works for me. If you've been following me, you know that I can change my mind from time to time, and feel free to comment that I'm completely wrong, you may be right. I'm not running a business. I'm not paid and have never received any compensation or facilitation for any review/brand/site here mentioned. In case one day we'll ever meet, I'll be the one offering you a cup of Italian coffee, too.
====================

Tuesday, 31 May 2016

blocks' challenge

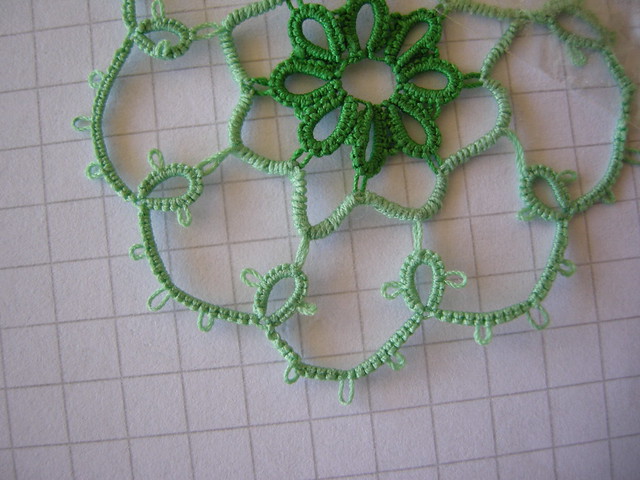
I've started a doily, I don't know who the designer is.
Pattern's from a book, but also proposed in a magazine that I've had for 20 years and my copy is in Italian.
I started buying "Anna by Burda" because they used to offer a yearly section for tatting, always in May. At that time that was my only source for learning "new" tatting, other than simple rings and chains. This issue is from May 1996.
Anyway, they provided textual and visual pattern, even if the text seems written by the granddaughter of aunt Priscilla (see related post)! I also used a different size thread, so their gauge for long picots didn't work for me.
Thread is Lizbeth size 80, color num.131. I used a gauge of 0.5cm and - luckily -, it worked at the first attempt!

There's a light celtic effect in this pattern, a round with block tatting has to be tatted apart and then connected to the central flower. Of course they simply say "join the block". Of course they say nothing about the direction of the tatting blocks and looking carefully at the picture it seems they actually didn't care too much. I worked with 2 shuttles in "direct tatting" (that is tatting chains as they are the second part of the split ring) and I always kept the tatting already done under my shuttles. That was a good solution for me, I had very few glitches. But this pattern challenged me!

Another round, another challenge. What I learned in previous round, I had to tune in a different way in the next. I tatted in direct tatting in a counterclockwise direction for the first part, then I had to change to a clockwise direction for the other round that connect the 5th to the 4th round. I'm still at this connection round. I tatted the second round of blocks with a dmc size 80 color num.3687.
To be continued...

Sampai jumpa (see you later)
( http://www.studyindonesian.com/lessons/greetings/ )
Ninetta
Related posts:
 aunts' recipe

P.S. Technical note. Since HTTPS settings have changed, visitors are now able to view my blog over an encrypted connection by visiting https://ninettacaruso.blogspot.com. Existing links and bookmarks will continue to work. But, there's mixed content here so something can't be viewed over encrypted connections, like widgets by third parts, for example LinkWithin. I know the problem, I may fix it when I find the time.

Friday, 27 May 2016

italian outfit

"La mi' cocca Deruta®" is a creation by Anna Lisa Piccioni of  "Le Antiche Fuseruole Deruta" (Deruta Majolica Beads, there's a site in English: http://www.puntiantichi.com/deruta-majolica-beads-and-buttons-the-fuseruola-an-antique-umbrian-token-of-love-in-majolica-from-deruta/ ).


Their slogan is: "She wears handmade Italian dresses only"! 

Last week I went to Zagarolo, near Rome, where there was a lace makers' meeting and there I bought the kit to make my own doll. Her head is handmade and hand painted, it is one of a kind, I struggled for choosing one head in the pile, they're all so pretty!


I first saw these dolls in the magazine "Giuliana Ricama", then I found one of them in the blog by Sabrina, here: http://macramemodena.blogspot.it/2015/11/ancora-una-bella-collaborazione-la-mi.html. Sabrina designed the red and blue dress. Lovely, isn't it!

The skirt is an adaptation of an edging from "Il chiacchierino - Selezione TRICOT - 1990", the top is just block tatting.

Nasvidenje.
( http://www.slovenian-translations.com/slovenian-language/phrases.html )
Ninetta
Related posts:

Tuesday, 17 May 2016

encapsulating

The strawberry in Italian is "fragola", that comes directly from latin, in fact it is the diminutive (in grammar) "fragula" from the plural latin word "fraga" (strawberries, source www.treccani.it).

Basic instructions: http://www.georgiaseitz.com/2003/encap/encap.html

Stems in the "mediterranean tatting diet" bookmark are made by encapsulating all tails with series of second half stitches, making the "Z" chain (http://www.georgiaseitz.com/setstitch.html). There isn't a proper pattern for this. Length must be adapted to your taste and thread's thickness.

I tatted the last leaf, I didn't cut the thread coming from the shuttle, then took other two leaves and put together in a bunch the long tails left. With the shuttle in my right hand and the bunch of threads in the left hand (stretched), I tatted unflipped second half stitches.


With the long tail left from the calyx, in the same way (shuttle in right hand and threads in left hand), I tatted 2nd half stitches to make a short stem for the fruit. I did the same also for flowers. That because I didn't want fruit and flowers directly attached on the main stem, but that was just my choice.

Back side for the strawberry:

 Back side for flowers:
I suggest to follow your style to put all elements together. Be creative.

Tip: there's many ends to deal with, also different lengths, so I attached shuttles one for each tail with a weaver's knot, to have a bundle.


At the end, I finished with a tassel, in this way:
I didn't cut the shuttle's thread, not yet. With the same shuttle, I tatted 3 little rings around the end of the "Z" chain. The stiches' count for this rings must be adapted to the thickness of the bunch of threads. Ends coming from the "Z" chain were split in two, then I added another bunch of short threads (about 12cm) and tied them in the middle with two ends from the "Z" chain, very close to the end of the chain. This bunch of short threads and the ends coming from the chain were folded in half and blocked with a ring, tatted with the same shuttle I used for the chain (leave a short bare thread to create the tassel's appearance). Again, the stiches' count for this rings must be adapted to the thickness of the bunch of threads. I made 3 rings of 14ds and left a long tail (about 6cm). 
Comb and trim the tassel.

Phew! This long post has been very difficult for me, all these English words and very few pictures! I hope I didn't forget anything, otherwise tell me off!

What can I do with this second one? A present, for sure!
แล้วพบกันใหม่   ค่ะ
(hope that is right! This writing is amazing, isn't it? rings an chains...)
(http://www.thai-language.com/id/801644
http://www.thai2english.com/ )
bye bye
Ninetta
Related posts:

Friday, 13 May 2016

edible flowers

That is someone can eat flowers, except these one in cotton, that may result a bit indigestible.

Actually in our diet we have flowers, like courgettes' flowers, artichokes, chamomile, saffron, broccoli, capers... Strawberry, botanically, it isn't a proper fruit but it's called "accessory fruit" and I've learnt that blossoms are edible and leaves are edible as well! OK, that's good to know, but I'd rather wait for the sweet red pulp!

I used the magic trick to hide the tail in each yellow ring, but I left long tails at the end of green and pink rounds. Start green round joining at one yellow picot. It's better starting pink round joining the next yellow picot after that one (chosen start for green).

I hope you like my version of the flower, enjoy!

Additional tips from Muskaan about her tatted leaf (pattern is in previous post) can be found here: http://tipsaroundthehome.blogspot.com/2016/05/tat-alongs-and-common-threads.html

Another tip from my side is that instead of using a clip, to change direction, I also tried something I've learnt when I tatted the mystery doily, that is
- leave a small picot,
- first half,
- one complete ds,
- reverse work, adjust last ds and continue the chain.
That worked for me.

... And that is for the sake of curiosity, I worked directional tatting, except for the pointed chain in the leaf, where I used my way to tat it, holding the second shuttle in my right hand. Jon's way and my way are just 2 ways to make the same knot. In my drawing I have in the right hand the SH2 shuttle, like in direct tatting. In the left hand I have the core thread. The knot is tied by the working thread over the core thread, exactly the same knot. It is the same movement done with thread around the needle in Puncetto lace. Not my invention. At that time, it was summer 2010, I taught myself the basis of "puncetto valsesiano" lace and discovered that I could speed my work (I'm very slow with the needle) with the help of the shuttle. I was doing a hanky. It looked to me like roll tatting, but it doesn't unravel, then I thought to use it in place of normal chains or mock rings, I didn't think to use it for changing the shape of the chain, that was Jon's clever idea. My experiments were shared at the end of 2010 in flickr:


ninettaprova1

ninettaprova2
... and also in April 2011:
motif.12

My last tatted piece for the bookmark was one leaf, that is because I used one shuttle loaded with green (coming from that leaf) to encapsulate tails coming from two of the other tatted leaves... But I tell you next week.

Do-VIZH-dane!
Ninetta
Related posts:
Tuesday, 10 May 2016

yet another leaf - yet another butterfly

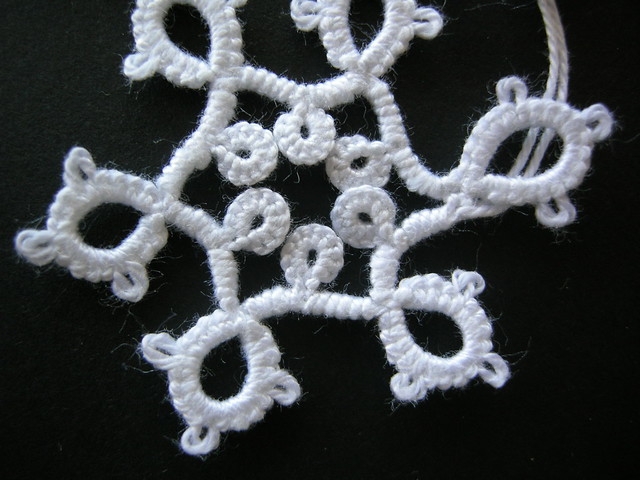
That's just another tatted leaf, as there're many and lovely tatted leaves. But if you compare this pattern with the strawberry's pattern, you surely notice that they are almost the same! I loved playing with split rings!

You see there's 3 puncetto knots in my pattern, that it's exactly the same knot described by Jon here:
http://tatsaway.blogspot.com/2011/06/pointed-chain.html
She had that clever intuition to use that knot for making the chain pointed! Thank you very much, Jon!
I tat that Puncetto knot in this way (drawing): https://flic.kr/p/9Cbk3R

°°°°°°°°°°°°°°°°°°°°°°°°°°°°°°°°°°°°°°°
Pattern for a Butterfly with Ikuta's picots.
If you like learning what picots I am talking about, please go to Muskaan's blog, here: http://tipsaroundthehome.blogspot.com/2016/05/trials-and-jubilation.html
Many thanks to her for clarifying the theoretical part and for helping me to find a notation for this pattern. 


All rings' loops are with SH1. Always tat normal ds with SH1. In my pic, the yellow thread is SH1, yellow segments are normal ds in a ring, the white thread is tatted like in a chain, white segments are normal ds in a chain.
Black indicates ring segments and SH1 picots;
Red indicates chain segments and SH2 picots (please note that SH2 in this pattern may be a ball thread).

JSS is the "join to the smooth side" and it is followed by a second half stitch.
p = normal picot
------ = very long faux picot (used for antennae, cut it only at the end).

R1: 3-3-3-3-3-3, 1 p 4
R2 (inner ring): 8 p 8
R3: 4+(join to R1) 1-3-3-3-1, JSS(join to R2). 1-3-3-3------, 1 p 4
R4 (inner ring): 8 p 8
R5: 4+(join to R3) 1-3-3-3-1, JSS(join to R4), 1-3-3-3, 1 p 4
R6: 4+(join to R5) 1-3-3-3-3-3, 3 

(Post updated to amend an oversight, sorry!)

Tie and cut (hide ends).
Cut the very long faux picot in half and make a knot at tip of each antenna.

°°°°°°°°°°°°°°°°°°°°°°°°°°°°°°°°°°°°°°°

dag/daag (have a nice day)
(http://blogs.transparent.com/dutch/how-to-say-hello-and-goodbye-in-dutch-plus-the-3-kisses/)
Ninetta
Related posts: 
Friday, 6 May 2016

ready?

Thank you very much for your last comments, I loved all suggestions I had for using the thread left in shuttles.
About that cheap shuttles, I'm content for now, they work good and I don't care to use the nail file if that helps me to save money for buying threads!

About the "mediterranean tatting diet": ready and finished, it was yummy! But you will see it after few posts about the pattern. I was ready to start the bookmark only when I tatted all these pieces:

That was less than what I tatted for the first version last year (at that time I picked only selected fruit for the lunch), in fact I had 3 versions of the strawberry, 2 for leaves and 2 for flowers and some failures. Then arrives that moment, when you slap your forehead with your palm. I found a funny dictionary online, no - sorry - it's a serious one, where they explain what a "facepalm index" is. Link is here: http://www.urbandictionary.com/define.php?term=facepalm%20index
If that was applied to my tatting design moments, I would get an FPI around 3, not bad though :-)

That is the pattern for the strawberry (2 versions) and calyx. Let me know if it's clear. I'll put it in flickr, too.


Allaha ısmarladık
(http://www.turkeytravelplanner.com/details/LanguageGuide/100words_lessons/100Words_01.html)
Ninetta
Related posts: 

Tuesday, 3 May 2016

testing new cheap shuttles

Do you have an idea why shuttles disappear? I thought I had a lot, but it was not so, then I bought some more. When I asked for my usual little cheap (€ 1,00) plastic shuttles, they gave me those instead:

The producer is the same, but they changed everything: the smoothness is different, the plastic - material - is another type, the metallic central pivot disappeared. I had to refine it, "knock the rough edges off", I used a nail file, that never happened with previous model. The shuttle slips and drops often. Do I just need to get used to them?

That shuttle challenged me, so I must use it... guess what I'm tatting with it! An easy guess this time! I'll give you the pattern in next post/posts (I don't know how many), hope you would like tatting it with me, with your shuttles!

And here it is a glance to what happened to some shuttles... After tatting few coloured bracelets I have leftovers, but what I can do to empty them? Suggestions needed!


um abraço
( http://www.learn-portuguese-with-rafa.com/Learn_Portuguese_with_Rafa_Newsletter-just-and-goodbye-in-portuguese.html )
Ninetta
Related posts

Friday, 29 April 2016

green carpet (and roses)

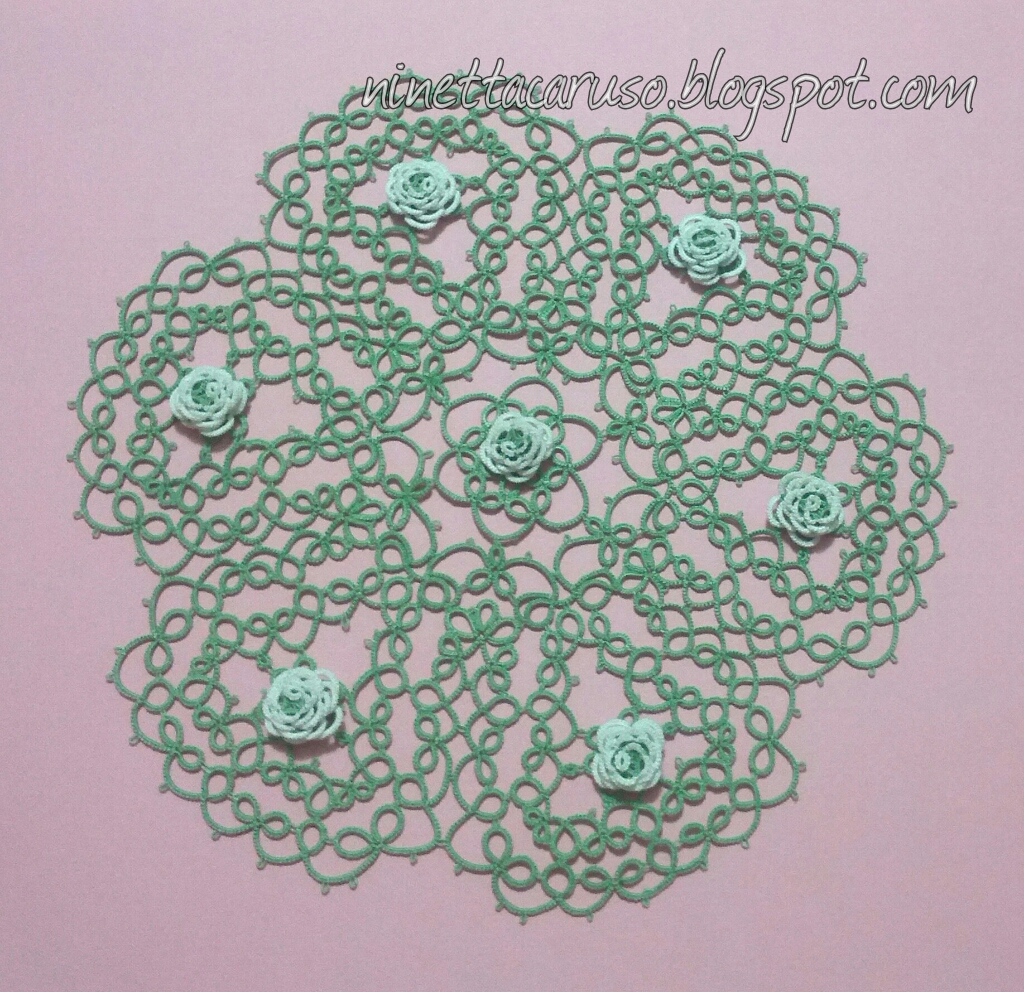
Thread is dmc size 80, white and green (col.num. 368). Doily's pattern is from a drawing I have done in 2011, but actually I was not happy with it, I had never tatted the "real doily". Now I think those roses are a beautiful complement. For perfection's lovers, there are many flaws, chains in last row are 10-10 outside and 7-7 inside, but some have been tatted wrongly, and a couple of rings are not the right stitches' count. Those roses also, they are exactly the number of roses that I have tatted, that is I kept those not centred and not perfect. You see what happen here when Mr Meticulous go out for a week!

Roses' pattern is by Jeanne Lugert and can be found here:
http://www.georgiaseitz.com/2002/jlrose/jlrose.html


Here it is with another background.

I played with an app in my smartphone, too.

That was the doily half done. There are the central part, tatted around the first rose. Then there's the round showed in previous picture. All around there are 6 triangular motifs that are joined to roses, and everything is surrounded by the last sinuous round.

joigin, bāaibaai
( http://www.omniglot.com/language/phrases/cantonese.php )
That's a great site for anyone interested in languages: www.omniglot.com

Ninetta
Related posts:

Tuesday, 26 April 2016

sharing is fun!

Thanks a lot for the great time I had yesterday with Georgia Seitz and The Online Tatting Class !

I shared a tutorial where some alternate methods to curl rings are listed, something a bit different from CRs, but it's everything explained there, if you please:
http://www.georgiaseitz.com/2016/ninettaalternatemethodsofcurlingrings.pdf

(UPDATE: the same doc is in Drive: https://drive.google.com/file/d/1X8Tw2XLtagd6BDNSKXHTABBD4hypZhG-/view  ) 

Thanks a lot to Muskaan. She was precious for encouraging, correcting my English and testing everything (EVERYTHING!!!).


I also prepared a pdf with 4 bracelets' patterns, where those effects are used. You can be surprised by me this time, they have even a name! Instead of bracelet #1, #2, etc, I called them "Bracelets Capriccio", if you are curious about that name, in Italian "capriccio" means whim. There's an idiomatic expression that says "ogni riccio un capriccio" ("riccio" means curl). Literally it is: [curly-haired people have] one whim for each curl, that is a way to joke with someone who has a temporary fancy/desire. It is nice, by no means rude, even with people with straight hair :-) 


(Update to add the link to a closely related post by Muskaan: http://tipsaroundthehome.blogspot.com/2016/04/trials-and-tribulations.html )

"¡Chau!"
 Ninetta
Related posts:


Friday, 22 April 2016

beautiful roses

I fell in love with this little roses!
On the third attempt, I started again from the original pattern. The white thread was hidden using Miranda's method of finishing with an SSSR, but I anchored the loop with the long green tail. In the same loop, I added a second shuttle, loaded with green thread:


The pattern of my base motif (under the rose) is 6 rings of 10-10, separated by chains with 3ds each.
I finished the little motif before "spiralling" the line of SR:
One green tail was cut and used to be threaded in picots, the other one was hanging from the back side of the motif. Then I used the rounded side of the crochet hook as an helper to wind the rose.
On the back, I just knotted the two ends.
I like how it turned out, but a rigorous scientific experiment it is proved true only if it is reproducible. Then I went. I have four roses now. That's all? I don't think so! I want to use an Italian expression: "Mi è venuta un'ideuzza..." (that means I have an idea how to use them but I hesitate to share it!!)
 Αντίο!
http://www.wikihow.com/Say-Hello-in-Greek )
Ninetta
Related post

Thursday, 21 April 2016

lilliputian rose


Thank you very much for your comments in last post  and at least 2 of you guessed right about the rose!

Thread is dmc size 80, white and green (col.num. 368). The finished rose measures half an inch in diameter.
Pattern is by Jeanne Lugert and can be found here:
http://www.georgiaseitz.com/2002/jlrose/jlrose.html

The white thread was hidden in the last SR with Miranda's method of finishing with an SSSR (link is on the sidebar on the left under "Resources"), but blocked with the green tail.

I left a long green tail and passed it to the back side, inside the center of the rose. I started the motif below using that tail and another shuttle with green thread, that is the first round of the green motif that peeps out under the rose. It wasn't easy because of the 3D rose and the narrow space.
But the rose ended up off-center (Note that Mr. Meticulous was here again!).

So I had another go, but this time I started from the motif at the base:
I followed the pattern from the last SR to the first, and everything was going well but then I mixed up the two long green tails while inserting them inside the rose, from the front side to the back. I wish I had the tools of a watchmaker :) Anyway, now it is positioned almost at the center of the base motif, but that resulted misshapen.

That is a collage with both roses close together, in the right - with the bigger back motif - there is that one tatted with the original instructions. I think that it is better than the rose on the left:

I'm not sure though, so I'm on another lilliputian rose. Now I want to start as the original, not finishing the rose but tatting the motif and at the end winding the line of sr. I'll show you pictures in next post, maybe tomorrow.

I love this pattern!
UPDATE: see also: 

Tuesday, 19 April 2016

bride's earrings

That's good! two earrings and both with the same pattern!!


... about all other prototypes:
The blue one remains as a pendant, 'cause I run out the same silk.
The brown one had its sibling - they are not twins though - and I wear them proudly, they aren't so showy as I thought before.
The white/cream version was more like the final pattern, so I made a second one and they are almost equal - ears are far enough.

Now it's time to shelve the plastic [aehm, polyester], so I resumed my shuttles loaded with dmc Special Dentelles size 80. Ah! It's nice to come back to the softness of the cotton! Next post. A clue? A classic by Jeanne Lugert... Did you already guess?

Hei hei (HAY-hay), Moi moi (MOI-moi)
http://wikitravel.org/en/Finnish_phrasebook )
Ninetta
Related posts:

Friday, 15 April 2016

a bride's necklace

Well, it ruffles a lot, I think next time I should put less beads.
It needed a little blocking, but at the end it was not so bad...

I forgot to show you how I put all those beads in chains without going crazy!  I put  beads a few at a time in the segment of core thread between the little finger and the stitches, then I hadn't to wind and unwind anything, the beads were already handy.

It's not perfect, not so taking, with all its cuts and adds of thread it is quite a disaster. But, I hope, it will find a recipient, someday.
Next post: Now I need... earrings to match !

Totsiens
( https://www.tripadvisor.com/Travel-g293740-s604/South-Africa:Important.Phrases.html
Ninetta
Related posts:

Thursday, 14 April 2016

forget about it!

AAAAARGH!!!!
I forgot a chain and I don't know how it happened but I discovered it only after completing the row.

Cutting and re-tatting? Forget about it: I haven't got enough thread to tat the row again, so scissors aren't appropriate here, I needed a scalpel...
I had 4 ends to deal with, numbered in pics. I only untied a chain, from the point where it joins to previous row, to where it joins to next chain.

I loaded a new shuttle (a wonderful gift from a wonderful generous tatter) with thread and beads and started CTM, attaching it to previous round, where it is pointed by an arrow in the picture.

Started the chain: I hid the end number 1 inside the first 4-5 ds of the chain, then joined to previous chain and went on. I left the end number 2 to be hidden at the end with a needle.


When I joined the following chain, I used the same method that I used for the last chain in the row, hiding the tail of the core thread as in a SSSCh. So, after the join, I had only one more end to deal with, number 5 in the picture.

To hide the end number 4 - that was really short! - I used an auxiliary thread, very thin, and passed it doubled through some beads with the help of a needle. I used it as though it was an auxiliary thread in the magic loop method to hide ends.

Ends numbered 2, 4 and 5 have been hidden with the help of a needle.

Coming soon: the finished necklace!

tchau
( http://www.brazil-help.com/greetings_responses.htm )
Ninetta
Related posts:

Thank you very much for all your nice comments.

Ciao
Ninetta